Last Friday I taught a Raku workshop at the local arts center. Raku is an ancient Japanese firing process which, here in the USA, we have adopted and "Americanized" to include post-firing reduction methods which allows the creation of new and different effects. This post-firing process is usually done when the hot pot removed from the kiln at between 1600-1800 degrees F. The pieces are put into fire-proof containers of combustible materials which ignite instantly, consuming the oxygen in the container and producing a reduced athmosphere (low or no oxygen). This allows the metals in the glazes to cool without oxidizing, and can create some very wonderful lusters and hues for which the Western Raku is known. Sometimes instead of using the reducing process, organic or biological materials are burned on the hot pot, allow the carbon from the burn to be absorbed into the pot itself, and creating some stunning designs and decorations.
Here are some photos from the Raku workshop... I hope you enjoy them!

Here I am standing by the Raku kiln and surrounded by all the equipment needed for safety and processing the hot pots. The kiln is heating a load of pots, while some of the pots for the next load are warming on the top of the kiln.

Here we have opened the kiln after it has reached the correct temperature to melt the glazes, and are about to unload the pieces using metal tongs.

This photos shows a hot pot being decorated with horse hair to create a stunning effect.

The reduction chambers we use are metal buckets that covered the pots and combustibles in a bed of sand.

The above photo shows two of the pieces cooling after going through the reduction process. Water is sometimes used to spritz the pieces to help cool them more quickly in order to lock in the colors.

The photo above shows some of the results from a kiln load.

In the above photo, my helper David and I are opening the kiln to remove the hot pieces for the post-firing processing. The kiln is so hot that it glows orange, which explains why we are wearing the face shields, gloves, welding leathers and fireman's outfit.

This photos shows a coordinated effort to transfer a two-piece luminary from the hot kiln over to the post-firing reduction area. The shredded newsprint and sawdust ignites to burn the oxygen from the air, as one of the participants prepares to cover the pieces in the sand pit.

Here I am transferring a vase to the sand pit for the post-firing reduction.

The above photo shows some of the results of another kiln load.

Here is a closer look at the luminary, with its copper lusters. Very cool!

Here is a wonderful vase/cylinder made by one of the participants.

My partner, David, is enjoying workshop and placing glazed pieces on top of the kiln to dry and warm in preparation for the next load.

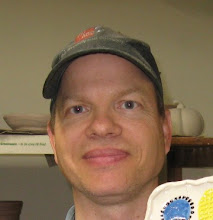
Here I am, mugging for the camera by the kiln.

Another pot transferred to the sand pit and ready to be covered by one of the participants.

You can see why we need the protective gear with how hot the pots glow when being removed from the kiln.

David and I are checking the glazes through one of the peepholes in the above photo.

The view of the open kiln at night is awesome!!!

I love the way the flames lick the pot as it is set on the pile of combustibles in the sand pit.

Here is another pot being moved to the sand pit.

I am putting horse hair on one of my pots in the above photo. You can see the carbon smoke trails as the hair burns and the carbon penetrates into the pot's surface.
David and I plan to build our own Raku kilns this summer so we can experiment with many more of the post-firing processes, and also with new glazes. Sounds likes fun!!!! :D
I'll share some photos of my own Raku pieces fired that night in another blog entry soon.
 The above photo shows the top shelves.
 Here's a look at the second layer of pots in the kiln.
 And here is the bottom layer of pottery.
 A closer look at a porcelain bowl.
 A jewerly box figurine.
 Another multi-color porcelain bowl.
 Some wine glasses made thrown from a single lump of clay.
 I like the glaze and stripes on this piece.
 Some pottery being inspected while it is cooling a little more.
 A pair of porcelain tumblers. (Already sold)
 Porcelain bowl and tumbler. (Also sold)
 More wine glasses.
 A better look at the first wine glasses.
 Seasoning shakers made from porcelain.
 The lines on these two porcelain shakers are actually inlaid colored clay. The one on the left is the bare porcelain without glaze, while the one on the right has a clear glaze over it.
 More porcelain shakers.
  More porcelain shaker with inlaid colored clay drawings.
 The shaker on the left is for cinnamon, and the shaker on the right is for paprika.
 A view of our booth at the art fair.
 The tomotoes are coming along on the plant in my yard. Can't wait until they are ripe enough to put on a hamburger and eat! Very delicious! :D
  My two cats checking out the catnip by the grape vines in my yard.