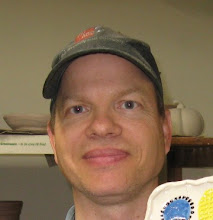
I've been busy lately, both in the studio making pottery and also doing contract installations of communications equipment in people's homes for a local communications company. I'm posting a few photos of some of my most recent pottery.
 The above cracked-surface piece will be on display at the local art gallery for the month of September as part of a gallery showing for my partner and me. We are both very excited about having the opportunity to present our pottery at this show!
 The above pie plate was custom made for a local customer.
 Here is another pie plate that I will be taking to the art sale in less than two weeks.
 The spiral white glaze was put on using the potters wheel and a steady hand (mine, of course... ha ha!).
 Here is another colorful pie plate that was custom made for a local customer. I think the colors are very nice.
 Another look at the pie plate.
 This cracked-surface vase has a porcelain clay body with a sodium silicate slip mixture painted on and then dried before being expanded (causing the cracking) using only one hand on the inside of the vessel. It can be a little tricky, but the effect is really interesting, do you agree?
 Here is a top view of the cracked-surface vessel. I sliced open the sides at the compass points to give it a slightly exploding effect.
 The above cracked-surface vessel is called BLACKHOLE. It is a clay pot representation of a black hole that is swallowing the tiny pieces of the surface as they swirl inward toward the event horizon. The actual pot is made of a brownstone stoneware clay body with a sodium silicate and porcelain slip mixture painted on the surface before being expanded one-handed from the inside of the vessel. It is on display at the gallery showing this month.
 The above vessel is a more traditional shaped cracked-surface vase, showing a good example of the interesting cracking that happens using the sodium silicate and porcelain slip mixture on a brownstone clay body.
 This piece is called AFTERMATH, and is a representation of some of the emotions encountered when one experiences a disaster like flooding, fire, or assault. This piece is also on display at our gallery showing this month.
 I wanted to try to made a bowl using the expanded cracked-surface technique, so this is my first bowl made in this manner.
 This is a small globe vase made using the cracked-surface technique.
I hope you have enjoyed viewing the pottery. The cracked surface pots are actually much more interesting when handled, as the surface is very rough, and it sort of reaches out and grabs you. Some of the fissures can be quite deep, especially in the porcelain based vessels.
Well, time to head to the studio and make some more pieces. I need enough to sell at the coming art fair, so I'd better log off and get to it!!! :D